S1 cases back from the
machine shop.. to overhaul the crank and put new connecting rods on.
Crank is put in the cases for transport.. now to
take it apart and paint the cases.
Pressed flywheels .. nice
Keep the bearings and spacer
ring to getter as these are normally made to size with each other.
The cases where blasted
clean as the old paint was bad and corrosion formed... no to tape and pain
theme in the original colour.
Bling....
New bearings for the gearbox.
Some starter grease in there.
Crank in, and cleaned the case surfaces.
Drop off Loctite on the case
bolts.
I use 2 gearbox bolts to tension the case evenly.
In the engine stand, the front brackets can be
mounted.
Pulling on the left crank
bearing.. do not press it in !!
….and crank seal in.
Some silicon gasket on the
stator plug.
Oil check ball and adaptor
on.. drop of Loctite on the adaptor.
Main bearing in.
…and 5e gear pulled in the bearing.
Old style neutral switch (tick
terminal)
…and mounting the gearbox shifter drum plates
Gearbox in.. a BAKER
smooth shift drum + detent plate is installed.
Torque the bolts... drop of Loctite.
Low effort detent arm spring BAKER.
Adjusting the shifter mechanism.
…and oil line mounted (feed
from oil pump to oil filter)
New cylinder studs.. drop of
Loctite and theme and torque these down.
Other bling... 1250 kit from RevolutionPerformance.
Check and set the piston
ring gap.... Wiseco tells you how much !!
Now first clean the cylinder
very good.. they look clean.. .. hot soapy water.. rag needs to stay clean when
you pull it though the cylinders !!!
Pistons in the barrels.
…and on she goes... off
course you first put the base gasket on ;-)
One down , hold the cylinder
on.. with nuts.. so it will not bang on the case if you turn over the crank.
Brand new Thunderstorm® heads on.
Oil the threads and flats.
So you get the correct
Torque (pre tension) on the studs.
Lifters in.
Pinion gear and nut on.. drop of Loctite.
Cams lining up.
The TDC mark on the pinion
gear is hard to see.. check 2x.
Prime the crank with some
squirts off oil before you put the cover on.
Other bling.... new cam
cover.
Timing cup and sensor in.
Pushrod covers push these
through the O-rings in the heads.
Pushrods in.
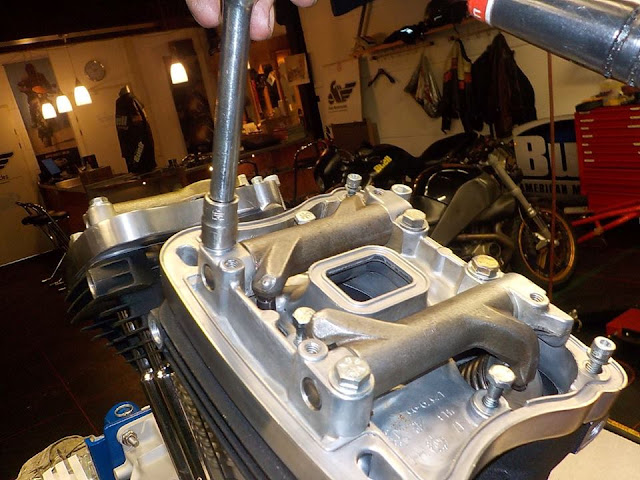
Rocker box bolts.. the old
style use 2 lengths , be aware off this.
Tighten the bolt evenly.. to hold the box flat.
XB covers on for better
breathing.
…and PVC valves on.
Oil pump in.
28 tooth front Aluminium belt
pully on.
Jims mega nut ... nice.
Upgraded rotor with 8 bolts
instead of four how will share off eventually.
…and new Barnett Scorpion
Clutch.
Need to remove the cover to get to the main
shaft nut.
Pressure plate back on.
Will turn the locknut around.
The nylon piece is there to
seal the threads so the oil does not leak.
New primary cover on.
Setting the chain tension..
this need to be checked again when the engine is in the bike.
For transport the clutch
mechanism on.
New oil pressure switch.
Plug off the spark plug holes.
..and mounting the new front
mount from BILLETBIKEBITS
…and setting this to TQ
specs.
Nice, this engine will be
mounted in a S1WL.. and is rebuild to new condition.. will be a show stopper ,
very nice project.


